Setting up a DevOps pipeline from GitHub to AWS S3

Hey there! 👋 I'm Hardeep Jethwani (HJ), your resident cloud aficionado and code maestro, proudly navigating the ever-changing seas of AWS Cloud and Full Stack Development for ~5 glorious years and counting. ☁️💻
Currently, I'm orchestrating the tech symphony as part of Team HSBC Bank, where I'm on a mission to enhance the banking experience through the magic of technology. 🚀💼
In my past life at Capgemini, I led exciting adventures like migrating critical applications to the cloud (18 and counting!). I had databases waltzing into the AWS Cloud, sprinkling a bit of containerization magic along the way. AWS managed services like RDS, Lambda, ECS, and friends? They were my trusty sidekicks. 🎩🔧
When not automating deployments with CI/CD finesse (think AWS CodePipeline, CodeBuild, and CodeDeploy), you might find me designing infrastructure like a digital architect using AWS CloudFormation. Security is my jam – I've got WAF, Security Groups, MFA, Cognito, and even a secret club in private subnets to keep things safe. 🔒💂♂️
On top of all that, I'm on a mission to reduce carbon footprints because, why not? HSBC's commitment to sustainability is my heart and soul. We're going for NET ZERO carbon footprint, and I'm leading the charge, one container at a time! 🌍🌱
And yes, the fun doesn't stop at work. In my past life at Tata Consultancy Services, I co-created a multi-tier Point of Sale application with a global footprint, touching the lives of billions. My automation tools were so efficient that even Father Time was left scratching his head. ⏳💡
If you're in need of a cloud-savvy comedian or a code deployment magician, look no further. Let's chat about tech, swap automation tales, or share some coding humor over a virtual coffee. Oh, and don't worry; I promise not to write code in my sleep (well, most of the time). Cheers to cloud adventures! ☕🚀
Hey geeks, In this blog we are going to look at how to establish a continuous deployment pipeline over AWS from GitHub to S3 for a static website.
This deployment pipeline will be triggered when you push any code to your GitHub repository that contains the code for your static website. We are going to use AWS Code Build, CodeDeploy and CodePipeline to deploy our code to S3.
I will walk you through the respective setup to be done in AWS Console. Also, I will provide you the CloudFormation templates to complete the same setup in a fling of time.
Architecture
First, let us go through the architecture of the setup as below:
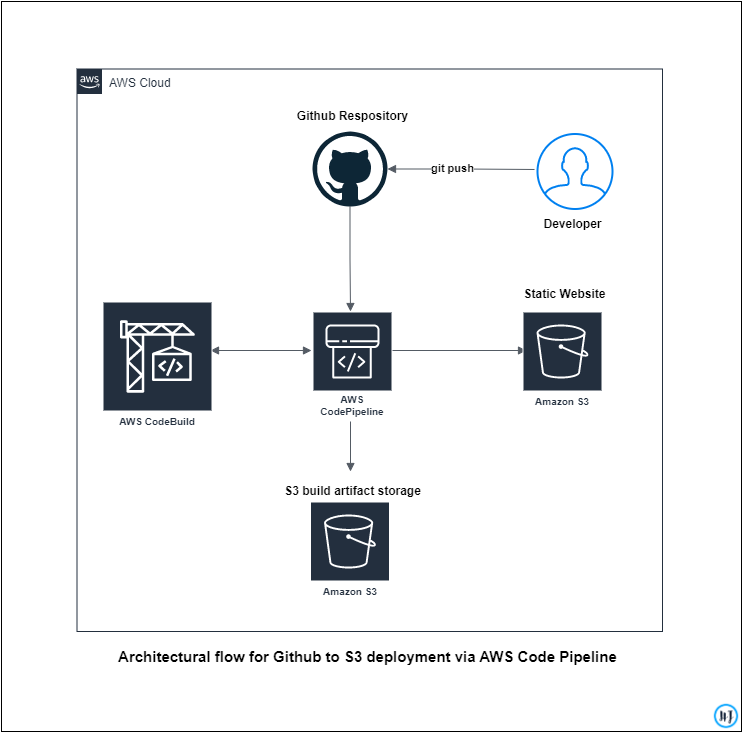
So as you notice above, the developer will push the code for a static website to a specific branch of our GitHub repository, which will trigger a push event via webhook to invoke the AWS CodePipeline. All the changes will get pulled in the AWS CodePipeline and after the respective build steps get completed, Build artifacts get stored in the artifacts bucket and then the code will get deployed to the respective S3 bucket which has static website hosting enabled.
No need to scratch your heads, we will look into all these things step by step.
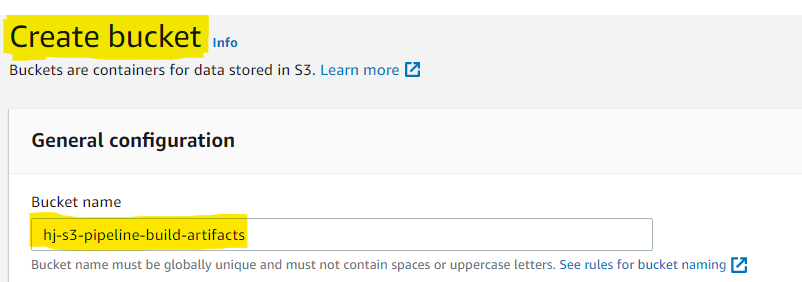
Creation of S3 Buckets
We will create two buckets here -
Creating artifact bucket:
The first one will be holding up the build artifacts.
Create a bucket with a unique name globally
Here name is "hj-s3-pipeline-build-artifacts"
Give a suitable name and create an artifacts bucket without changing other configurations
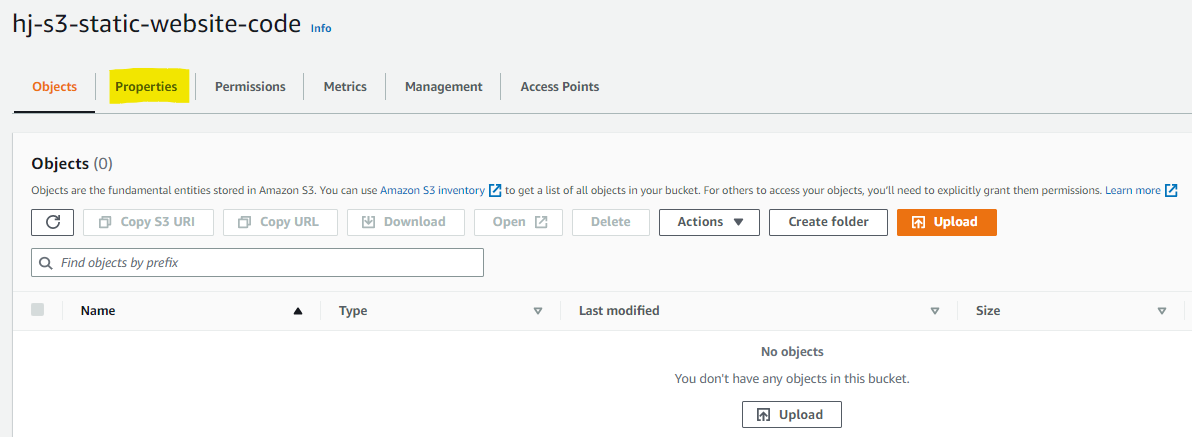
Creating bucket for our Static Website:
And the second bucket will contain our static website code. I have created a bucket named "hj-s3-static-website-code". You can give names accordingly, whatever is available and meaningful.
- As our second bucket is going to host our static website, We will make it available to the Public by allowing all public access. You can do this while creating the bucket by unchecking the "Block all public access" checkbox.

- Once our static website bucket is created, we need to set up the static website option. Search for the bucket and navigate inside the same.

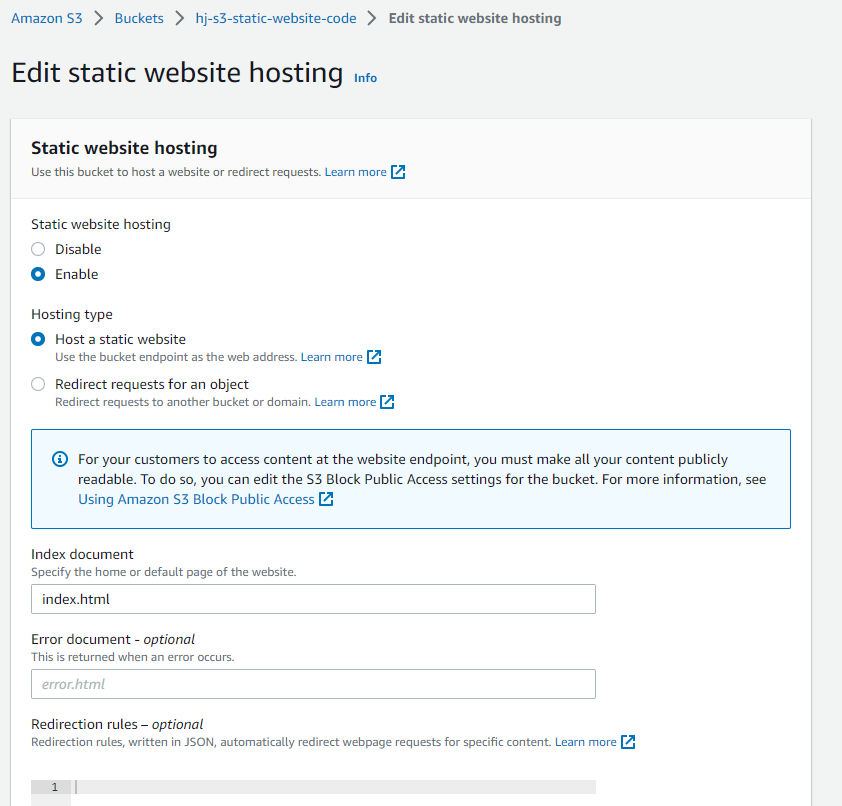
- Go to the properties section, at the bottom you will find an option for "static website hosting" which needs to be enabled.

Click on Edit and then enable the static website hosting option. You will see some more options loading. The below actions are to be performed -
Select the hosting type as "Hosting a static website"
Add the index file name for your static website - here taking it as "index.html"
You can add an error page if you have any.
We don't want to redirect our website to any other bucket, so keep the redirection rules empty, as we don't want to redirect our website to any other bucket.
Save the changes once the above actions are completed.
Now move to the properties section of the same bucket and add a bucket policy to make the objects accessible. Example JSON policy is below:
{
  "Version": "2012-10-17",
  "Statement": [
    {
      "Sid": "PublicReadGetObject",
      "Effect": "Allow",
      "Principal": "*",
      "Action": "s3:GetObject",
      "Resource": "arn:aws:s3:::your-bucket-name-here/*"
    }
  ]
}
Save the changes.
Now we have our two buckets. Let's move on to CodePipeline section.
NOTE: In this case, we are going to deploy a simple static website to our S3 bucket so, we won't have any typical build steps. But in the case of any static website built using react or angular, you may have to write down a few commands in the build spec.
Setting up CodePipeline:
So now in our code pipeline setup, simply we can say that we have three stages --
Source -- > Build -- > Deploy
Source: Pulls the code from our source repo and exports the results that can be used in later stages.
Build: Build the copied code (Ex: In the case of AngularJS, you may use NPM build)
Deploy: Deploys the artifacts provided from the Build stage to the S3 bucket.
Let's start building the same in our console.
Go to CodePipeline service and click on create pipeline.

You will see that we have 5 steps to complete. Let's go through them in detail:
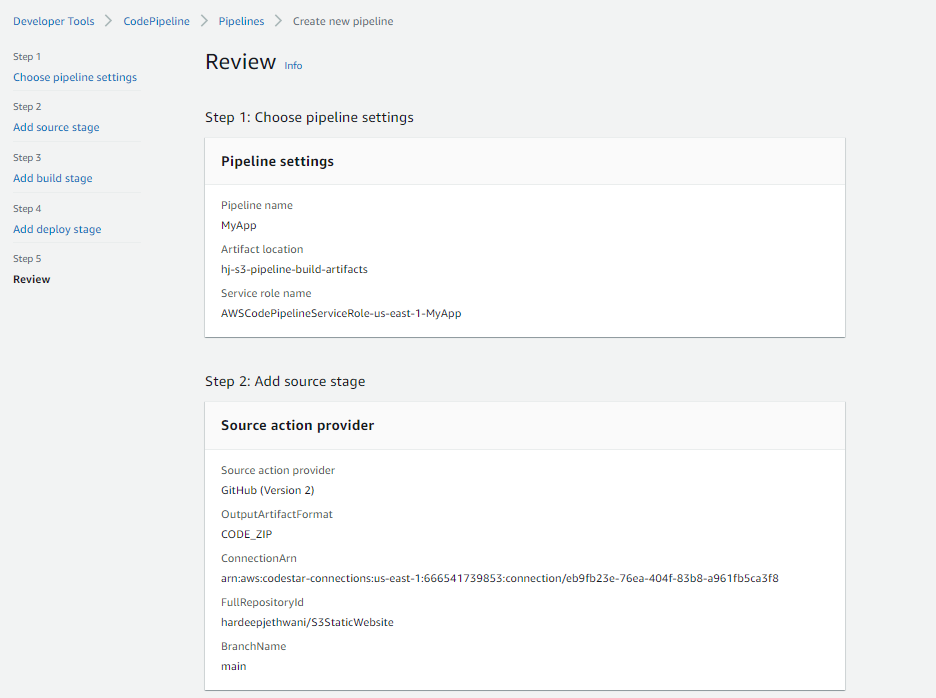
Step 1: Choose Pipeline Settings:
Add the name of the pipeline (Here I have used MyApp)
Create or use a Role that will allow the pipeline to perform specific operations. Here I am taking a new Service Role.
Got to advanced setting and select the artifact bucket that we created (Here hj-s3-pipeline-build-artifacts)
Click on next to move to the next stage

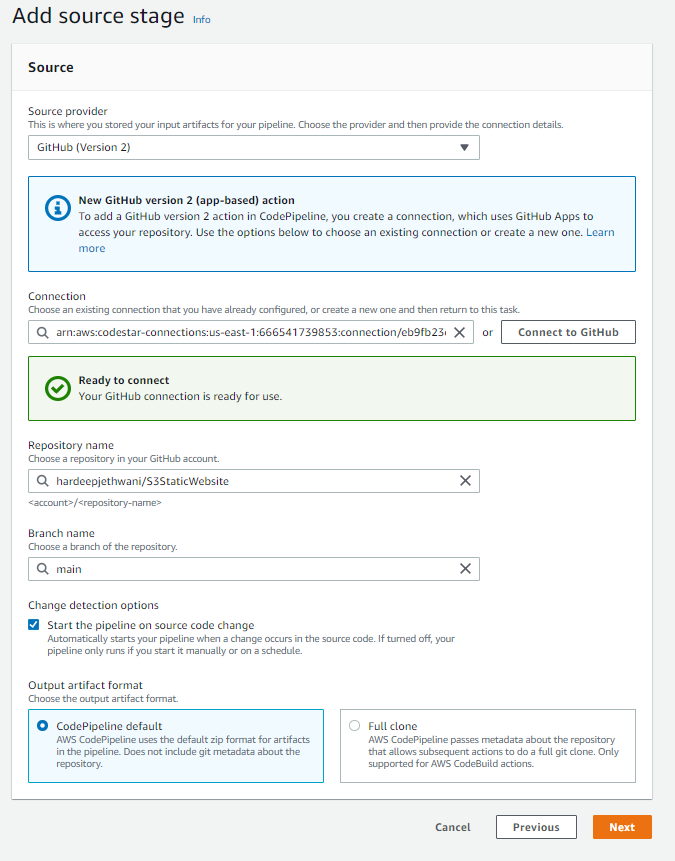
Step 2: Add Source Stage
Select source provider (Here we are using GitHub as our source)
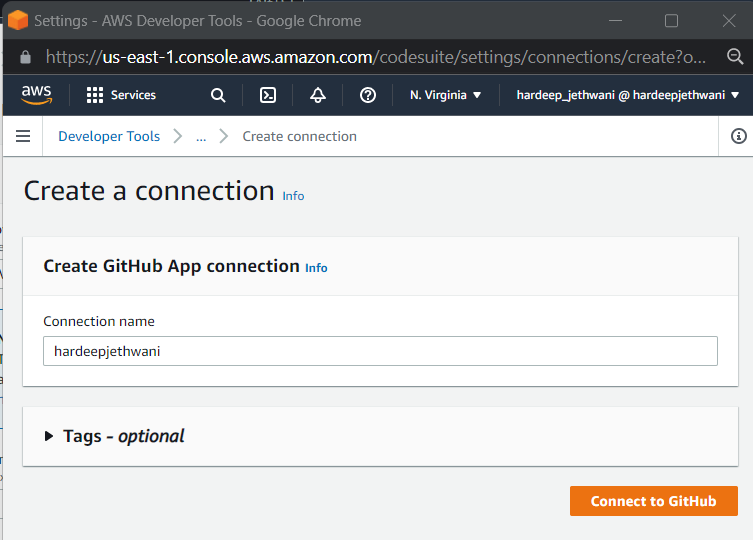
Connect to your GitHub Repository that has the static website code.
While connecting to GitHub, you will have to establish a connection to your GitHub repository. You will get a popup window as below where in the connection name you have to give your GitHub username and click on Connect to GitHub.
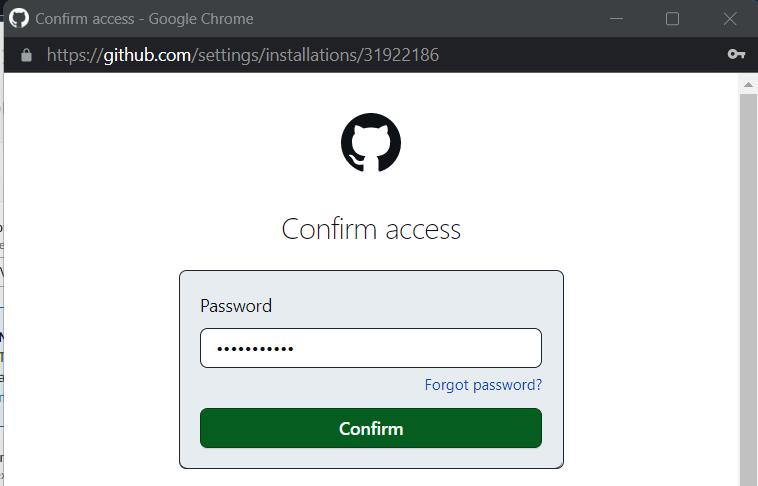
- For further authentication, we will get the option to set up the AWS Connector plugin in GitHub. You can click on Install New App and connect to your GitHub Account and select the specific repository.
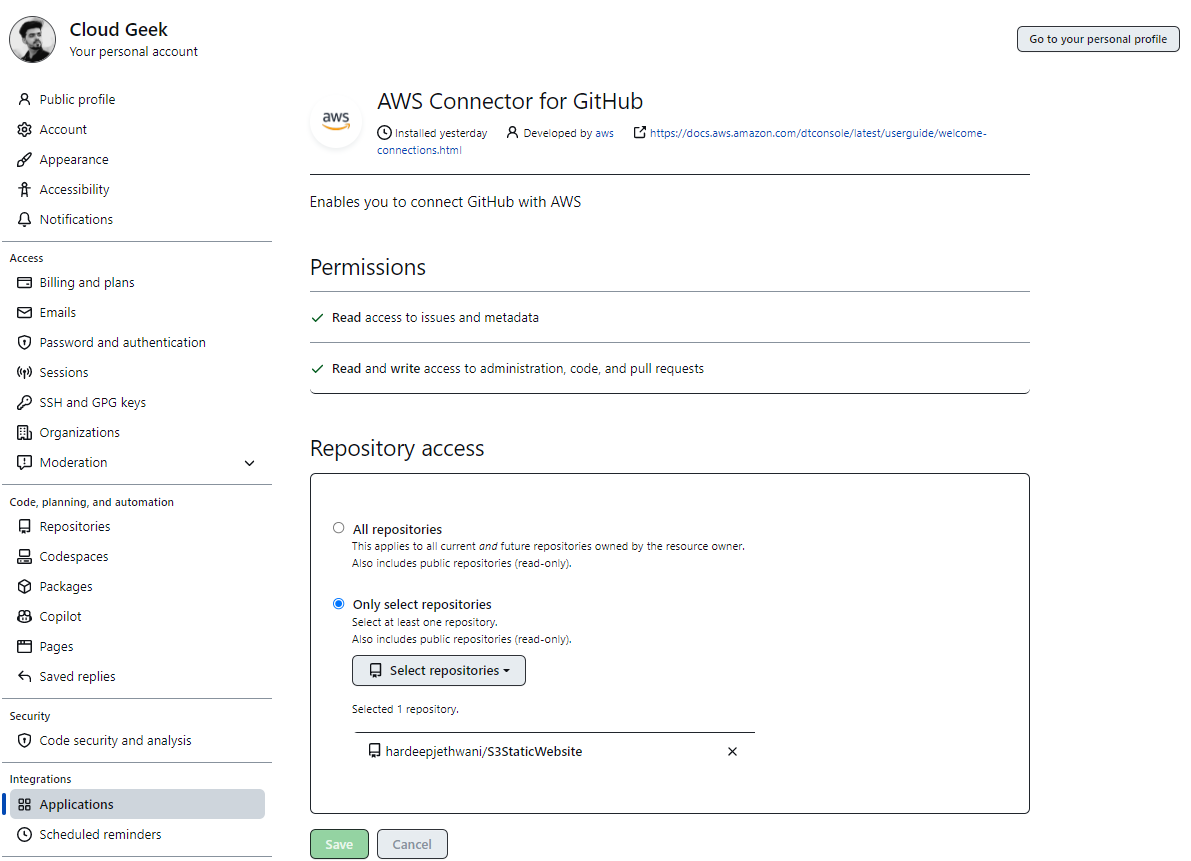
- Once you are done with all the steps above, the Connector gets installed in your GitHub Account for selected repositories. Then, you can click on Next to finish the connection establishment to your account.
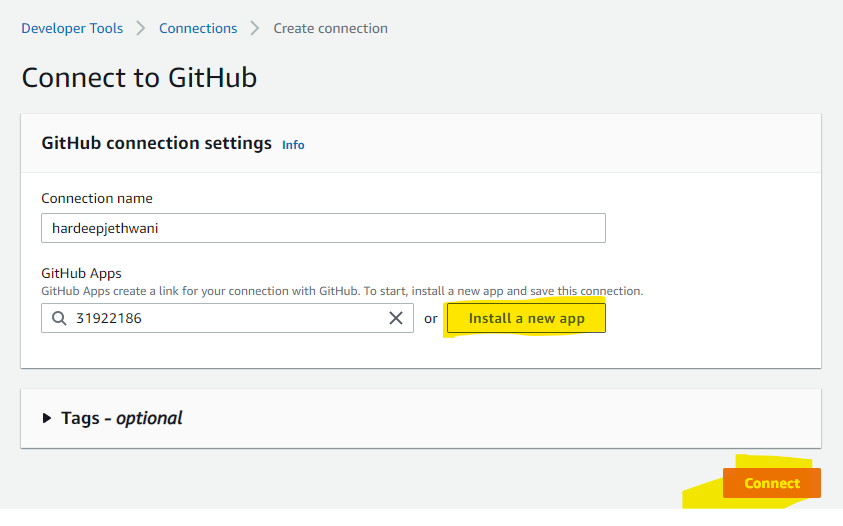
- Proceed to the next step after selecting the repository and branch.
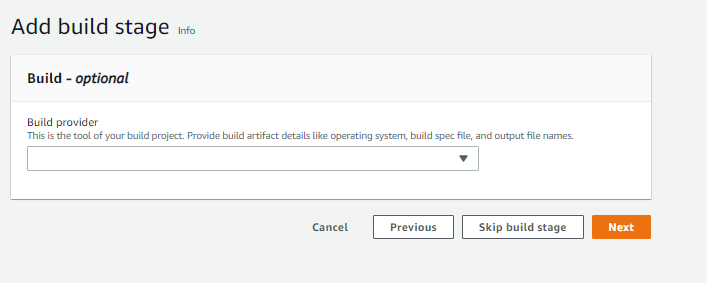
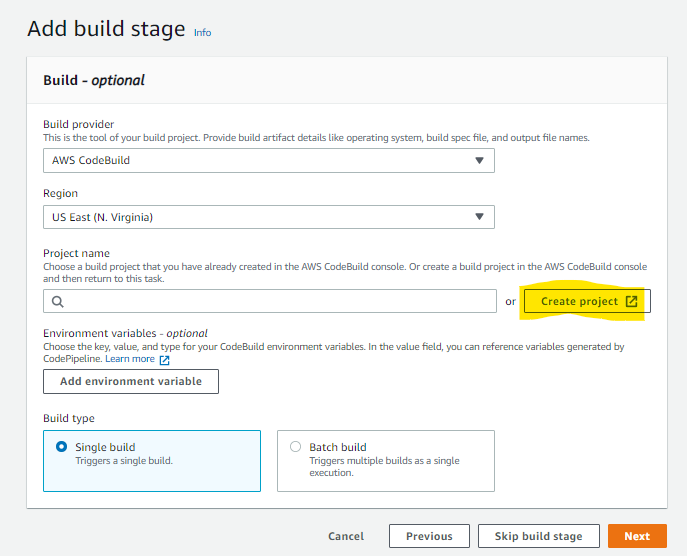
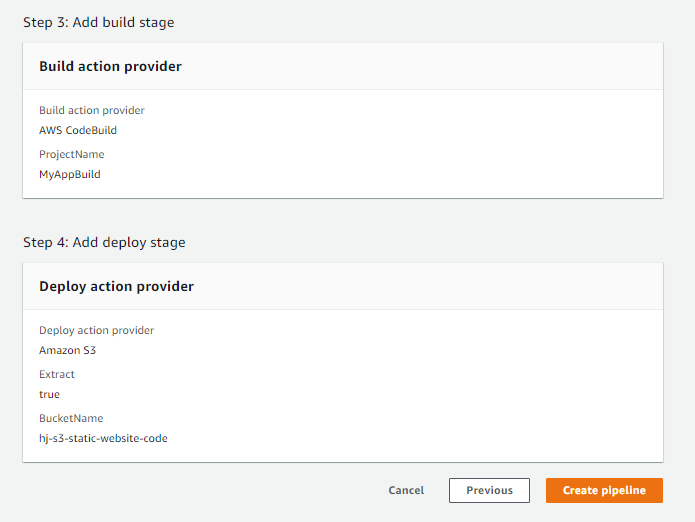
Step 3: Add Build Stage
Here, we will take the build provider as AWS CodeBuild.
As stated earlier, we won't use any build commands here as it is a simple HTML/JS/CSS project deployment. You can find what has been used in the below given link - https://github.com/hardeepjethwani/S3StaticWebsite
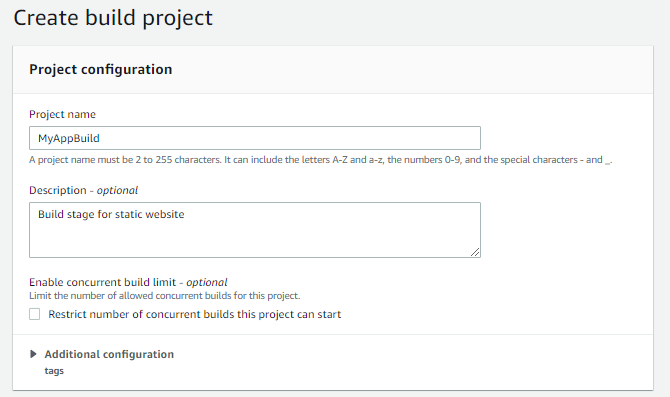
- Create a new Build Project.
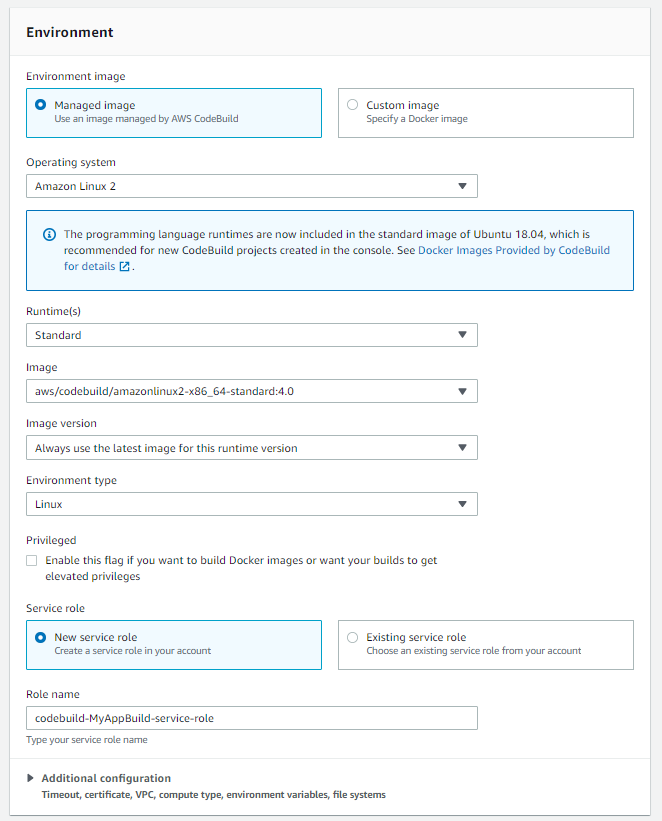
Add details for the build environment like Runtime (Here Standard), Environment Image (Here we are using Amazon Linux 2), Environment Type (Here Linux), and Service Role.
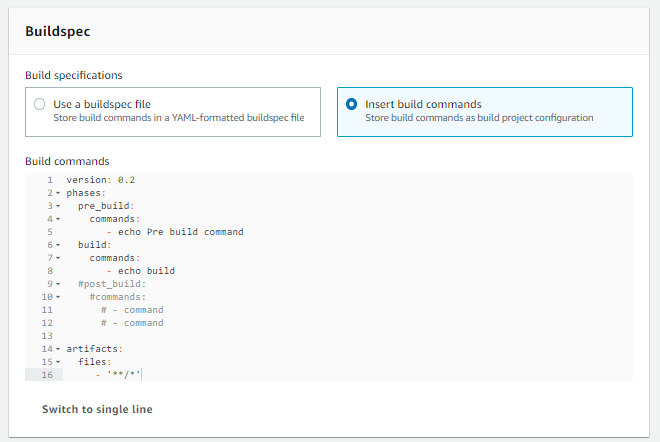
Add the Build Commands as shown in the snap below. (You can find a sample buildspec file that can be used for a React project at - https://github.com/hardeepjethwani/github2s3-cloudformation/tree/main/codebuild-build-commands)
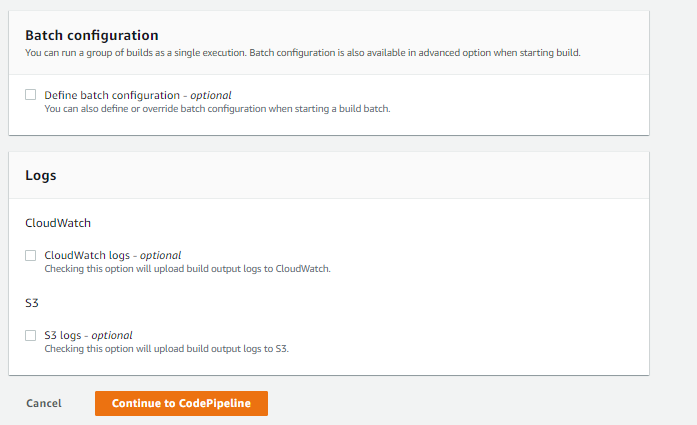
- Select the CloudWatch or S3 Logs if required, else skip and Continue to CodePipeline.
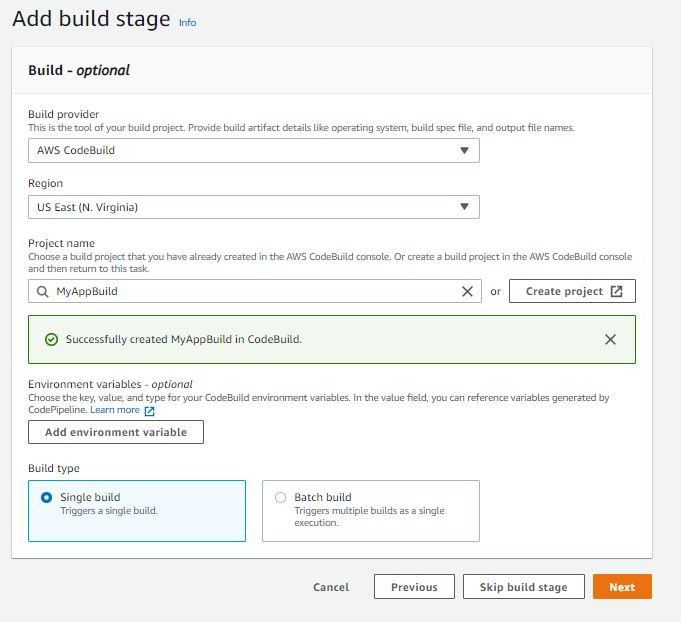
- Now the Build Stage is ready, and we can move to Deploy Stage.
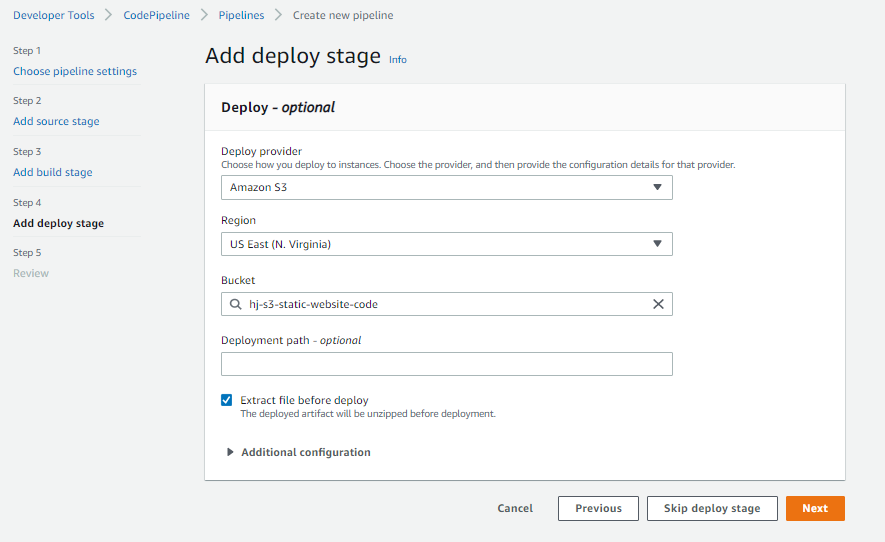
Step 4: Add deploy Stage
We have to deploy our static website to S3 Bucket, So we will select Deploy provider as Amazon S3
Select the deployment bucket.
You can select any specific path for deployment inside S3 if you want.
Check box against extract files before deploy needs to be selected as we want our code artifact to be extracted and get stored in the Deployment bucket.
Step 5: Review Stage
Under the review stage, all the details such as pipeline settings, source action, provider etc. can be verified
Post verification, click on "create pipeline"
You will see that pipeline is created.
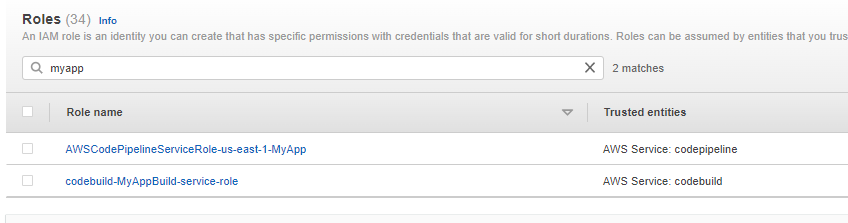
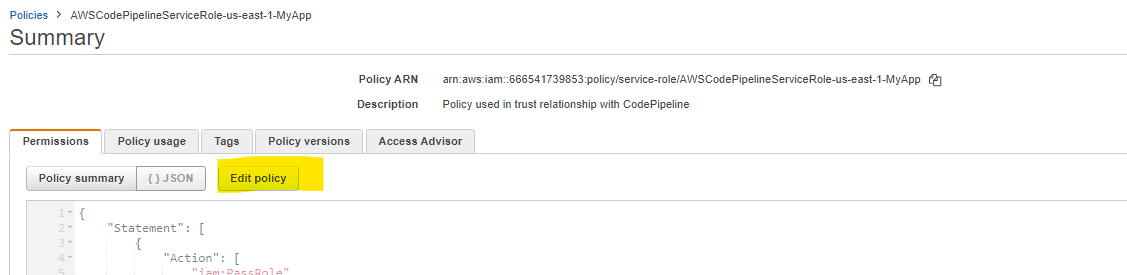
But you might notice that Build Stage or Deploy stage is getting failed. It will be mostly because of insufficient permissions to build and deploy roles that we used for our pipeline.
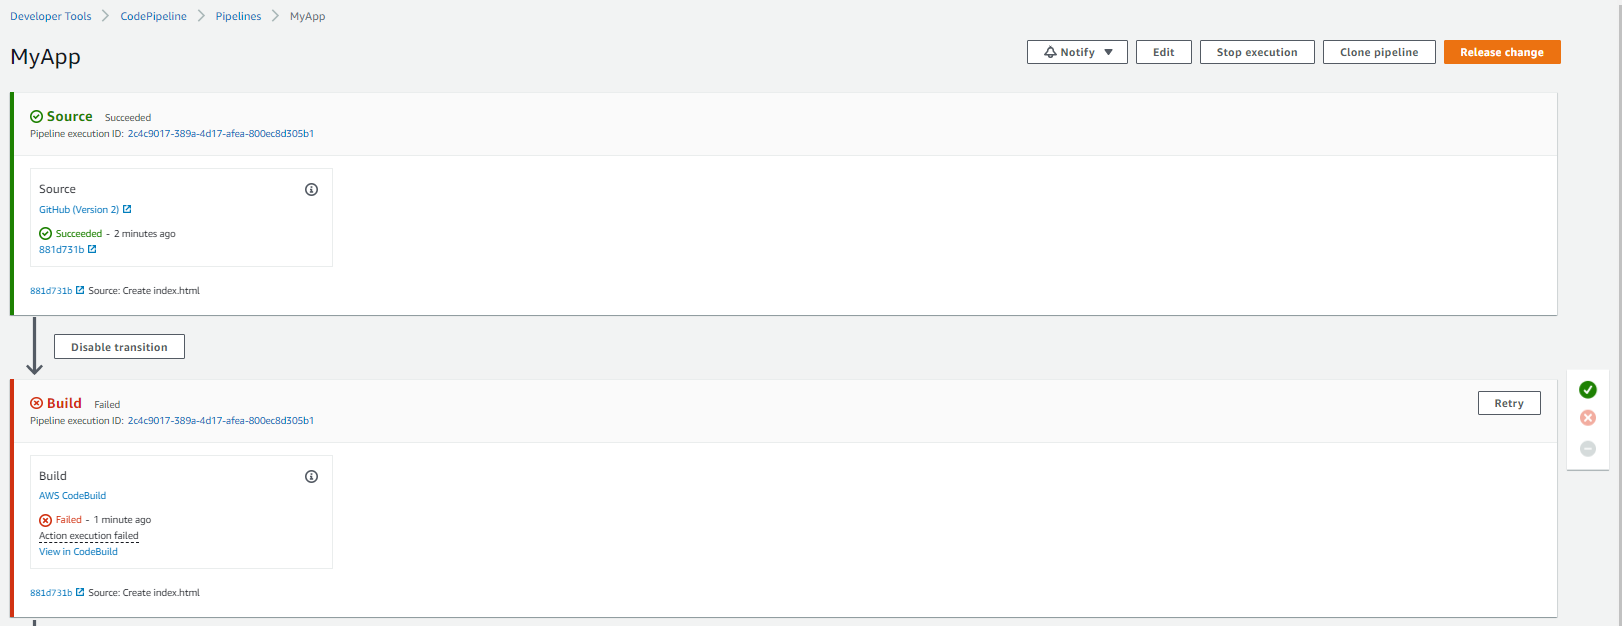
- If you face this issue then you need to go into IAM and search for the respective roles and edit the policies as in files at - https://github.com/hardeepjethwani/github2s3-cloudformation/tree/main/role-policies
Once this is done, You can click on Release change on our pipeline, which will re-trigger our pipeline. If you have followed this blog thoroughly, then your pipeline should now be working fine.


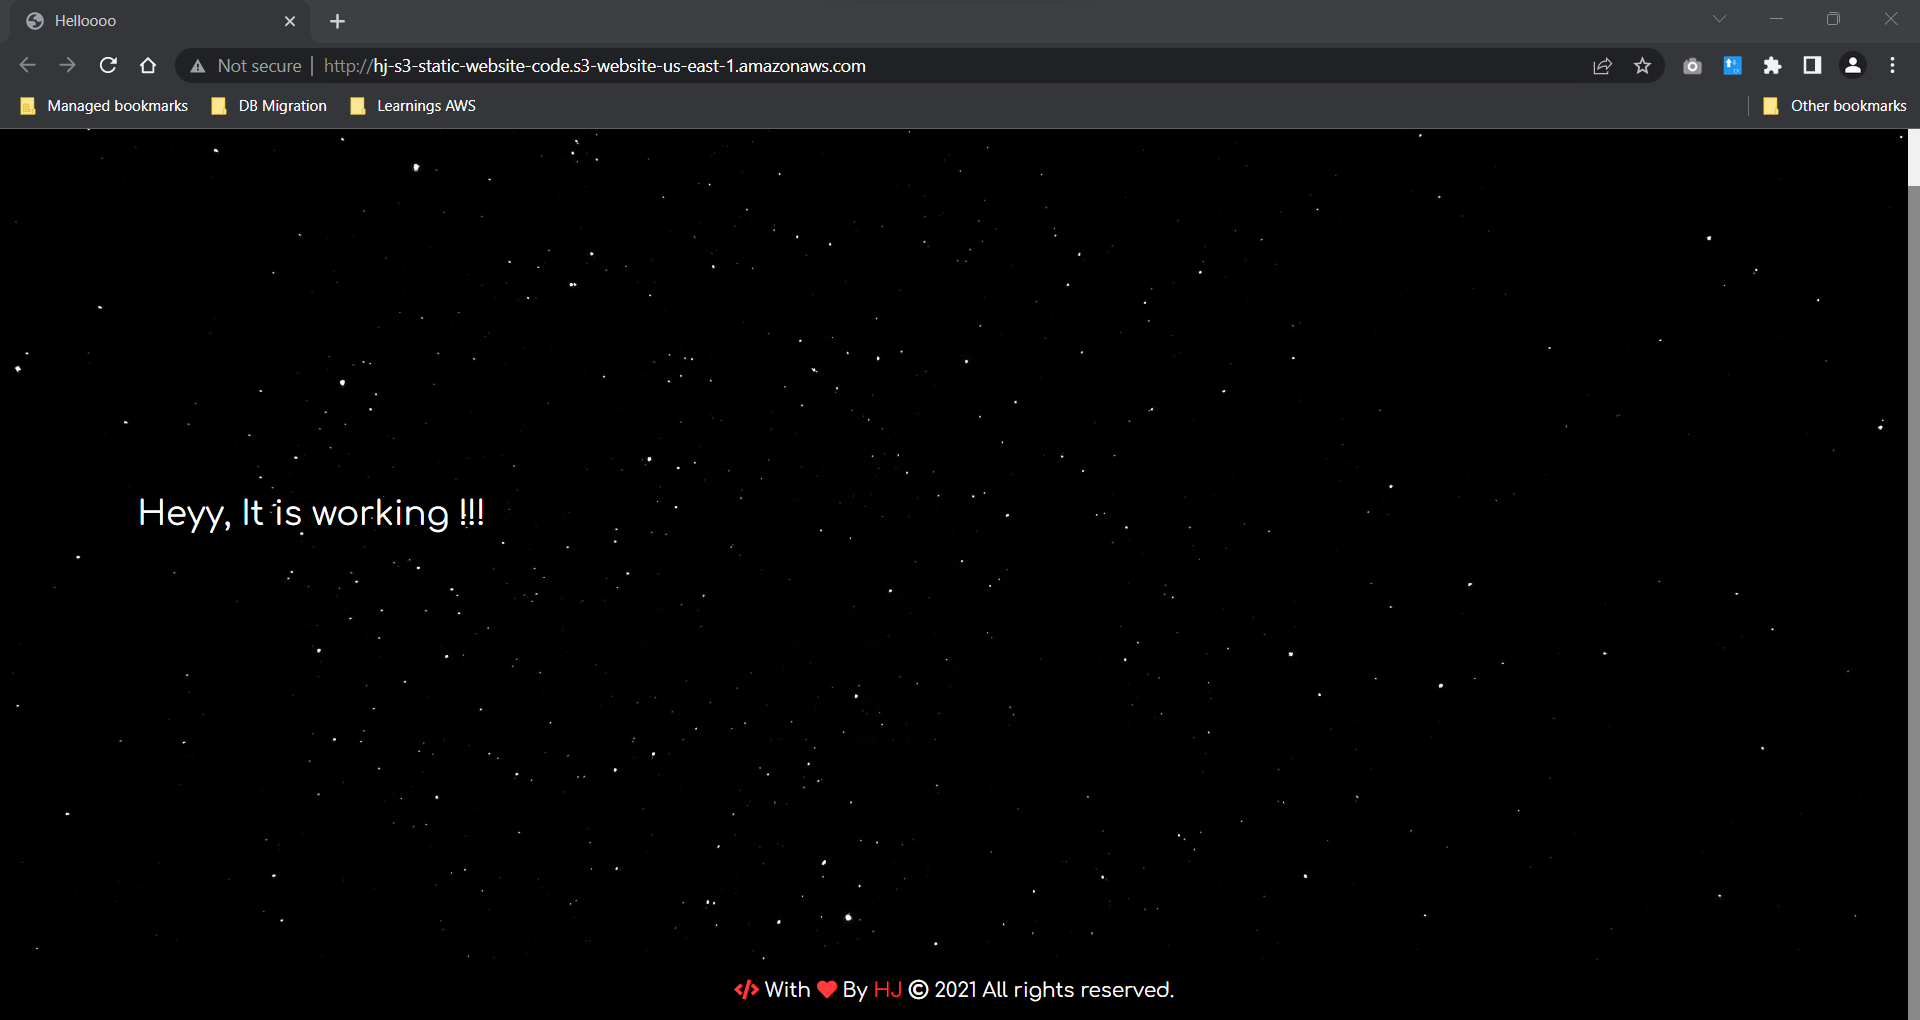
For testing, go to the S3 bucket for static websites, then in properties go to the static website section where you will find a URL that will take you to your static website.
If you have used the same files as of mine, you will get to see a page like below
You can also deploy the above-created infrastructure using the CloudFormation templates. You can find the same at - https://github.com/hardeepjethwani/github2s3-cloudformation/tree/main/cfn-templates
For any clarifications, suggestions you can add comments in the comment box, or you can also connect with me on LinkedIn
Do check my other blogs @blog.hardeepjethwani.com
If you find my blogs helpful, then you can Buy me a coffee ;)