

Migrating Oracle Database to AWS Cloud using AWS RDS, AWS S3 and Oracle Data Pump (PART - II)
Hey there! 👋 I'm Hardeep Jethwani (HJ), your resident cloud aficionado and code maestro, proudly navigating the ever-changing seas of AWS Cloud and Full Stack Development for ~5 glorious years and counting. ☁️💻
Currently, I'm orchestrating the tech symphony as part of Team HSBC Bank, where I'm on a mission to enhance the banking experience through the magic of technology. 🚀💼
In my past life at Capgemini, I led exciting adventures like migrating critical applications to the cloud (18 and counting!). I had databases waltzing into the AWS Cloud, sprinkling a bit of containerization magic along the way. AWS managed services like RDS, Lambda, ECS, and friends? They were my trusty sidekicks. 🎩🔧
When not automating deployments with CI/CD finesse (think AWS CodePipeline, CodeBuild, and CodeDeploy), you might find me designing infrastructure like a digital architect using AWS CloudFormation. Security is my jam – I've got WAF, Security Groups, MFA, Cognito, and even a secret club in private subnets to keep things safe. 🔒💂♂️
On top of all that, I'm on a mission to reduce carbon footprints because, why not? HSBC's commitment to sustainability is my heart and soul. We're going for NET ZERO carbon footprint, and I'm leading the charge, one container at a time! 🌍🌱
And yes, the fun doesn't stop at work. In my past life at Tata Consultancy Services, I co-created a multi-tier Point of Sale application with a global footprint, touching the lives of billions. My automation tools were so efficient that even Father Time was left scratching his head. ⏳💡
If you're in need of a cloud-savvy comedian or a code deployment magician, look no further. Let's chat about tech, swap automation tales, or share some coding humor over a virtual coffee. Oh, and don't worry; I promise not to write code in my sleep (well, most of the time). Cheers to cloud adventures! ☕🚀
Hola Geeks !!!
Hope you followed the Part - I of this blog and have completed the AWS Resource creation and Initial Analysis. If not, then I suggest you to start with Part- I.
So let's move ahead with another tasks of our Migration Phase !!!
Uploading the Database dump to S3 bucket using CLI.
Step 1 : Configure the AWS user in AWS CLI that you created earlier Go to your command line and type 'aws configure'. You will be asked to enter the access key ID and secret access key.
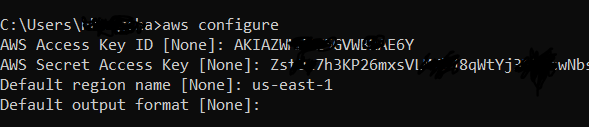
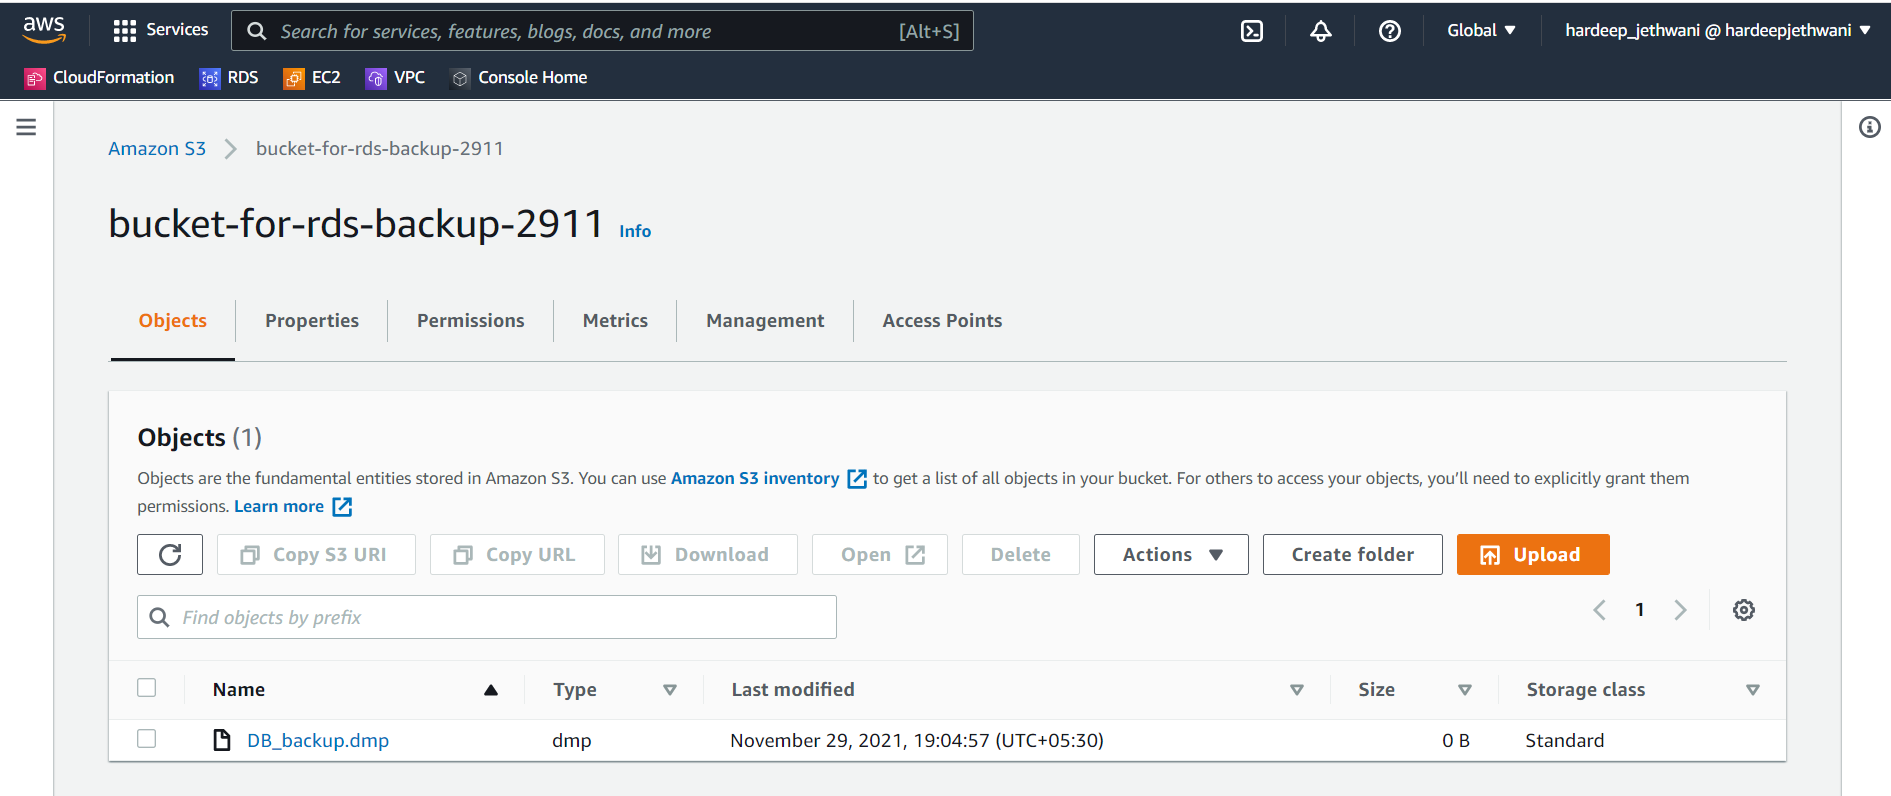
Step 2 : Use following command to upload the dump file to the S3 bucket : 'aws s3 sync "/path to your file directory/" s3://bucket-name '

You will see that the dump file is uploaded to the S3 bucket.
Copying the dump to RDS Oracle Database Directory using S3 Integration feature
You might remember that we enabled S3 Integration while creating the RDS Instance. Enabling that, RDS has created some predefined procedures which allows us to get the access to dump file via our RDS instance.
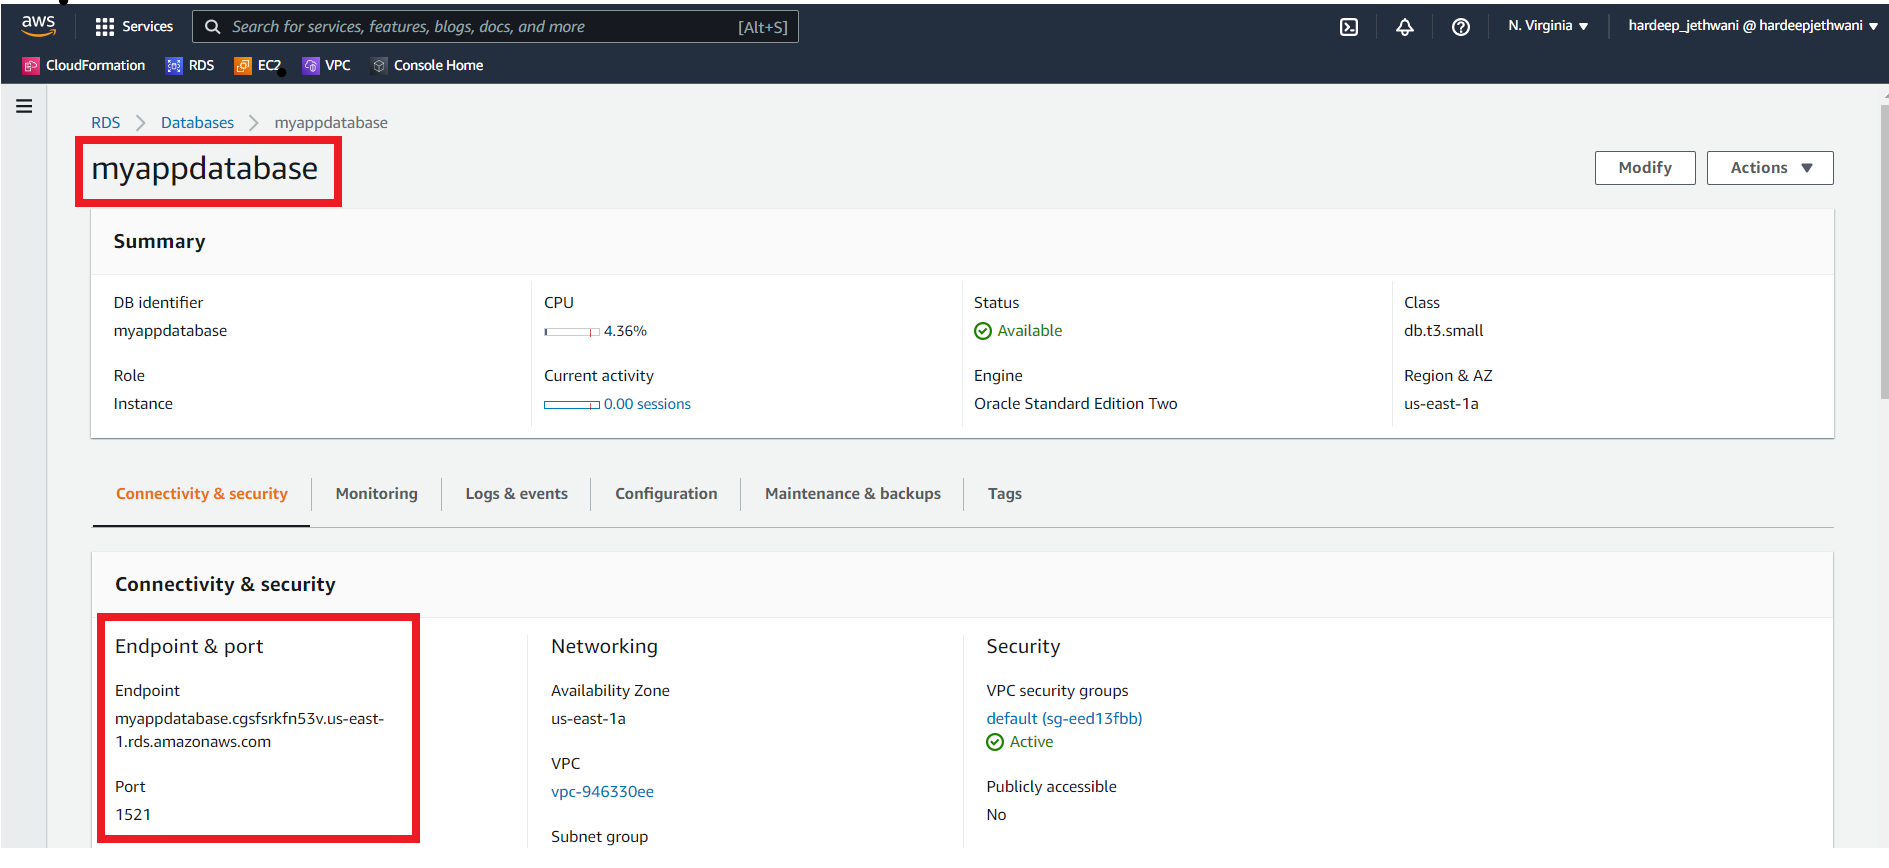
First connect to the RDS Oracle instance using SQLPlus or SQL Developer tool. You will have to use the Master Username and Password that you used while creating the RDS instance. And you can check the endpoint and port details from Connectivity & Security section.
After connecting to RDS hosted Oracle instance. Use below RDS function to copy the exported dump file from S3 bucket to Oracle Directory (If no directory is there then you can create one as mentioned earlier in Part - I of this blog).
SELECT rdsadmin.rdsadmin_s3_tasks.download_from_s3(
p_bucket_name => 'bucket-for-rds-backup-2911',
p_directory_name => 'DATA_PUMP_DIR')
AS TASK_ID FROM DUAL;

/* You will get Task ID for the copy task that got initiated. Example - 1637839033517-270*/
You can check the logs for the same task id using:
SELECT text FROM table(rdsadmin.rds_file_util.read_text_file('BDUMP','dbtask-1637839033517-270.log'));
To verify whether the required dump file is uploaded or not, you can use:
SELECT * FROM TABLE(rdsadmin.rds_file_util.listdir(p_directory => 'DATA_PUMP_DIR'));
Creating the required tablespaces, profiles, roles and users.
During the Analysis phase we collected the details from the source database regarding, Tablespaces, Roles, Profiles and Users. So now we will have to use the details to create the basic structure of our database.
While performing operations on Database Structure in Oracle instances of RDS, you should remember one point that the syntax of queries is somewhat different than normal Oracle instance. For more details you can refer the whitepaper - "Performing common database tasks for Oracle DB instances"
Step 1: Create all the required tablespaces using below syntax:
CREATE TABLESPACE users2 DATAFILE SIZE 1G AUTOEXTEND ON MAXSIZE 10G;
Step 2: Create all the required roles.
CREATE ROLE ROLE_NAME;
Step3: Create the required profiles with the desired limits as in Source DB. Step 4: Create all the required users assigned with default tablespace, quota on other tablespace, profile, and password accordingly.
Importing the dump using PLSQL procedure:
After completing all of these steps, we are ready to import our dump file using the below procedure that uses Oracle Datapump.
SET SERVEROUTPUT ON;

DECLARE
v_hdnl NUMBER;
BEGIN
v_hdnl := DBMS_DATAPUMP.OPEN(
operation => 'IMPORT',
job_mode => 'SCHEMA',
job_name => null);
DBMS_DATAPUMP.ADD_FILE(
handle => v_hdnl,
filename => 'DB_back.dmp',
directory => 'DATA_PUMP_DIR',
filetype => dbms_datapump.ku$_file_type_dump_file);
DBMS_DATAPUMP.ADD_FILE(
handle => v_hdnl,
filename => 'Import_RDS_2911.log',
directory => 'DATA_PUMP_DIR',
filetype => dbms_datapump.ku$_file_type_log_file);
DBMS_DATAPUMP.METADATA_FILTER(v_hdnl,'SCHEMA_EXPR','IN ("Schema1", "Schema2"')');
/* You can disable table compression by using below transformation statement
DBMS_DATAPUMP.METADATA_TRANSFORM (handle => v_hdnl, name => 'TABLE_COMPRESSION_CLAUSE', value => 'NONE' );

If you want to skip any kind of objects during the import use below filter statement (example: exclude domain_indexes during import)
DBMS_DATAPUMP.METADATA_FILTER(v_hdnl, 'EXCLUDE_PATH_EXPR', 'IN (''DOMAIN_INDEX'')');
*/

DBMS_DATAPUMP.START_JOB(v_hdnl);
END;
Above PL/SQL procedure will be running in background. You can check the process by querying the process id -
select sid,target_desc,(Sofar*100)/totalwork as percentage_complete
from gv$session_longops where sid = your_sid_here;
If you don't know the SID, then you can find it via:
SELECT sl.sid FROM v$session_longops sl, v$datapump_job dp
WHERE sl.opname = dp.job_nameAND sl.sofar != sl.totalwork;
So finally, We are at the end. The last and final task is to verify the number of tables, Rows and invalid objects and compare the same from source database. If everything is same then WooooHooooo we are done with the migration !!!!!!!
Hope this tutorial blog gave you some knowledge and helped you in your Database Migration. I will soon come up with a blog over some other AWS Service or some real time task over AWS.
If you found this blog helpful, then you can buy me a coffee by clicking on the Sponsor button !!!
Also, feel free to add your comments. Your comments will help me improvise my next upcoming Blogs :smile:
You can connect with on LinkedIn